
Creating Boston Commons in EQ7
Do a google.com search for Boston Commons quilt images and you will find more variations than you can imagine. I had no idea there were so many! A member on the Info-EQ mailing list asked about how to recreate a variation that she had seen in a book. I found a similar variation of this particular Boston Commons quilt here by doing a search on QuiltIndex.org.
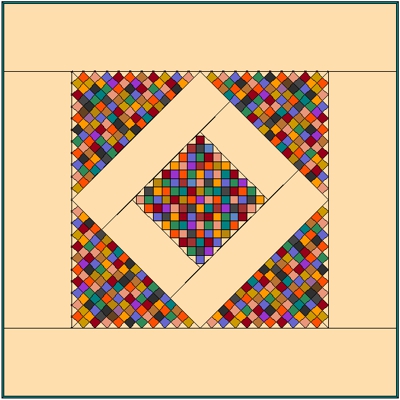
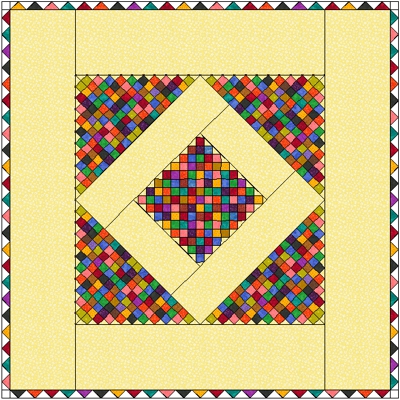
Although it's a simple design to stitch, in EQ whenever you are dealing with on point squares it can take some trial and error (and a calculator!) before you get the sizes correct. Here are some brief instructions on how I recreated the quilt in question using EQ7. The small squares in this quilt finish at 1 1/2" (cut size in 2") and with the borders the overall quilt dimensions are 70" x 70".
For the layout, keep it simple! In the Layout Library look under Basics by Style. I used the Square in a Square 1 layout. Add this to the Sketchbook now.

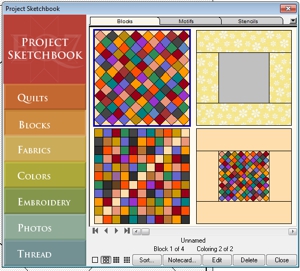
For use in the above layout, you will need to create four new blocks like these. The four block you see on the lower right is a merged block of #1 and #3. We'll get to that later...
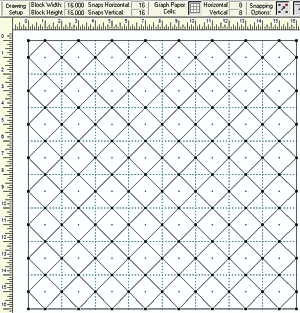
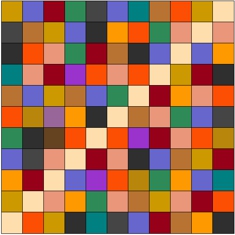
Block #1. Create a new EasyDraw block. Block size 16.00" x 16.00" / Snaps 16 x 16 / Graph paper lines 8 x 8. Draw diagonal lines as shown to create 8 on point squares horizontally and vertically. The graph paper lines will help you with placing them correctly. Add this to the sketchbook, color the squares as you like, but the triangles around the ouside should match your background fabric.
Block #2. Create an 11-patch block in EasyDraw. Block size 11.00" x 11.00" / Snaps 11 x 11 / Graph paper lines 11 x 11.
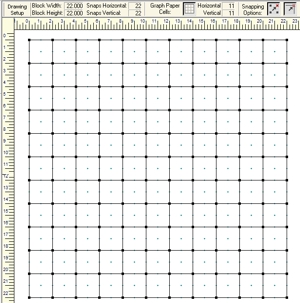
Color a desired, but color the center diagonal row of squares as shown with your background fabric. When you set this in the Square in a Square layout only half of the block will show. It will make more sense soon!
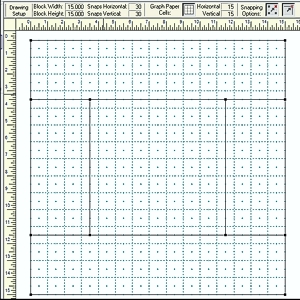
Block #3. This is a frame block. We will merge it with Block #1 to make the fourth block. Using EasyDraw, Block size 15.00" x 15.00" / Snaps 30 x 30 / Graph Paper lines 15 x 15. Draw the frame lines 3 1/2" in from the sides of the block.This may seem like an odd size to use for this, but my end goal is ease of drawing and to have all the squares finish at 1 1/2" when set into the layout.
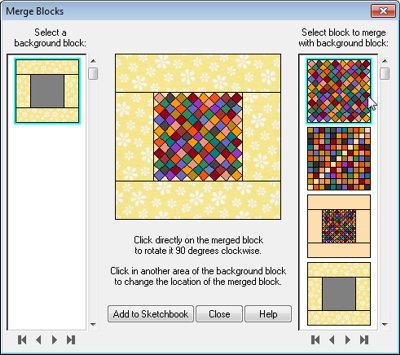
Block #4. No drawing this time! While on the block worktable, go to BLOCK>Serendipity>Merge Blocks. On the left, choose the frame block (Block #3) and on the right side choose Block #1. The 8-on point block should be in the center, if it is not simply click the center and it will place it there. Add the block to the Sketchbook.
The quilt layout. Switch to the Quilt worktable and from the sketchbook, place the Square in a Square #1 layout on the worktable. Choose the Set tool and select Block #4 from the blocks palette. Point the cursor over the center block and click once to place it in the center on point square. Now place the 11-patch (Block #2) in the remaining eight triangles. That was easy!
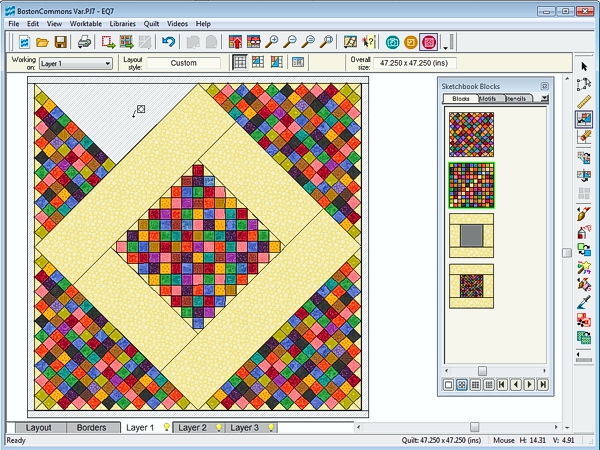
Borders. On the borders tab, select the existing border and resize it to 12.375" to make the quilt 70" x 70". Add a second border to simulate the binding if you like.
To simulate a Prairie Point Border. Make first border 11.875", this makes the quilt dimensions 69" x 69" (which is easily divisible by 3). Make the last border 1.50" using the Point Out style withe number of blocks in border 23 x 23. These prairie point triangles measure 1.50" x 3.00".
I also tried another variation of Boston Commons, which is the type I usually think of when I hear the name. Can you figure out how I did it?
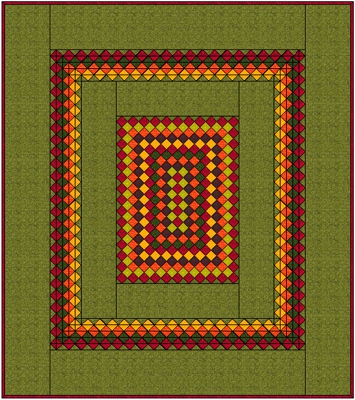
The center is an On-point layout with blocks set 11 x 15. I got creative to get those on-point squares to come out right in the borders -- I used alternating borders of Points In and Points Out increasing the number of blocks horizontally and vertically by 1 for each successive border. To get the corners to come out "square", I set half square triangle blocks in them (you have to look real close to see them). So with the exception of these corners, there are no blocks in this quilt! Later if I have some free time, I'll post a diagram with the sizes. Meanwhile go ahead and play with it and maybe you'll discover a even better way to do it!

Home | Pattern Patch | Sharing Patch | EQ Patch | CorelDraw Patch | Blog | Email
Copyright
©2012 Patti R. Anderson (patchpieces) All rights reserved.
Unless otherwise stated, images and content on this site are protected by copyright law . No image or content may be reproduced
in whole or in part without the express written permission of the artist (Patti R. Anderson).